Preamble
I’m conflicted every time I write one of these posts.
On one hand, anti-bots are important. They help stop credential stuffing attacks1, block denial-of-service attempts, and keep bad faith scrapers from inflating hosting costs2 (especially in the era of AI). If you’re running a business on the internet these days, it’s hard to survive without some kind of bot protection in place.
On the other hand, I kind of hate them.
Most anti-bots rely on aggressive browser fingerprinting3, collecting a plethora of device signals4, and quietly deciding whether you're “human enough”. They often break for those using Linux, smaller browsers like Ladybird5, or even privacy-focused ones like Brave. They push the web toward a monoculture where only certain OS/browser combos are considered legitimate.
So I sit in this weird middle ground. I get why they exist. I get why companies use them. But I also worry about what they're doing to the open web.
This blog post doesn’t present anything particularly groundbreaking. In fact, much of it revisits topics covered before on this site. My goal here is simply to invite discussion and hear different perspectives on the matter.
Introduction
Vercel recently announced BotID, "an invisible CAPTCHA that protects against sophisticated bots without showing visible challenges or requiring manual intervention".
It’s available in two modes: Basic and Deep Analysis. The Basic tier is free for all users. Deep Analysis costs $1 per 1,000 requests.
Both modes rely on client-side signals to detect bots, however, Deep Analysis is powered by Kasada's anti-bot script and is meant to catch more sophisticated bots.
This post primarily focuses on Basic mode, however, Deep Analysis leverages scripts we've covered in a previous series.
Setup for both is pretty straightforward.
Setting up BotID
You can start by adding BotID to your existing Next.js project like this:
yarn add botid
Then, protect a route using the following code:
import { checkBotId } from 'botid/server';
import { NextRequest, NextResponse } from 'next/server';

export async function POST(request: NextRequest) {
  const verification = await checkBotId();

  if (verification.isBot) {
    return NextResponse.json({ error: 'Access denied' }, { status: 403 });
  }

  const data = await processUserRequest();

  return NextResponse.json({ data });
}
That’s the basics of BotID setup. You can then create a simple form page that calls this API:
"use client";
import { FormEvent, useState } from 'react'

export default function Page() {
  const [bot, setBot] = useState<string | undefined>(undefined);

  async function onSubmit(event: FormEvent<HTMLFormElement>) {
    event.preventDefault()

    const formData = new FormData(event.currentTarget)
    const response = await fetch('/api/sensitive', {
      method: 'POST',
      body: formData,
    })

    const data = await response.json<{
      error?: string;
      data?: string;
    }>()

    if (data.error) {
      setBot("BOT");
    } else if (data.data) {
      setBot("HUMAN");
    }
  }

  return (
    <div>
    {bot === "HUMAN"  && <p id="is-bot">You are a human</p>}
    {bot === "BOT" && <p id="is-bot">You are a bot</p>}
    <form onSubmit={onSubmit}>
      <input type="text" name="whatever" />
      <button type="submit">Submit</button>
    </form>
    </div>
  )
}
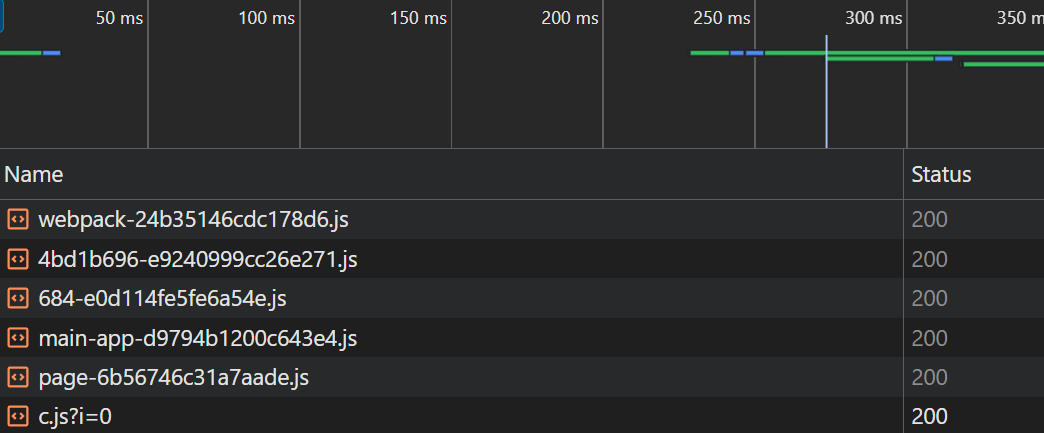
Discovering the c.js Script
Visiting this route in our browser, we can see that a new script is fetched: c.js.
A preview of the script shows reveals obfuscated JavaScript. This is clear from the use of random-looking hex offsets and indirect calls to functions in globals like crypto and JSON, where a separate function is used to resolve the actual method names.
async function X(b, x) {
    const S = k;
    // It's calling stuff from the crypto API but the function names are mangled
    let L = crypto[S(0x271, 'x2Nz') + S(0x248, 's74E') + S(0x1a3, 'sKIN') + S(0x1cc, 'rKTC') + 'ues'](new Uint8Array(0x71 * 0x1f + -0xca4 + 0x1 * -0xfb))
        , V = crypto[S(0x255, '(mPC') + S(0x27b, 'mz*i') + S(0x230, 'Qq38') + S(0x215, 'rTDp') + S(0x20f, '[]ns')](new Uint8Array(-0x2144 + 0x33 * -0xad + 0x43c7 * 0x1))
        , W = await crypto[S(0x23e, '#J9v') + S(0x1c0, 'KL$e')][S(0x223, 'UnKT') + S(0x1ce, 'KL$e') + S(0x1a4, 's74E')](H[S(0x240, 'BxPe') + 'Yk'], new TextEncoder()[S(0x263, 'ZsXG') + 'ode'](b), H[S(0x205, '0dQT') + 'gg'], !(-0x1543 * 0x1 + 0xd1 * -0x1d + -0xf * -0x2ff), [H[S(0x1b9, 'BxPe') + 'VA'], S(0x20a, 'S#TT') + S(0x26b, 'BxPe') + 'Key'])
        , E = await crypto[S(0x23d, '7#V2') + S(0x1f8, 'uGPe')][S(0x222, 'hyOI') + S(0x22b, 'v4[O') + 'Key']({
        'name': H[S(0x286, '@UgF') + 'gg'],
        'salt': L,
        'iterations': 0x186a0,
        'hash': H['CPO' + 'bW']
    }, W, {
        'name': 'AES' + '-GC' + 'M',
        'length': 0x100
    }, !(0x5a9 + 0x13a * 0x18 + 0x2318 * -0x1), [S(0x284, 'uGPe') + 'ryp' + 't'])
        , R = await crypto[S(0x261, 'ggq(') + S(0x26f, 'UnKT')]['enc' + S(0x24d, 'rTDp') + 't']({
        'name': S(0x226, 'S#TT') + '-GC' + 'M',
        'iv': V
    }, E, new TextEncoder()['enc' + S(0x1c1, '@UgF')](JSON[S(0x1fa, 'ZsXG') + S(0x227, 'j]8P') + S(0x22a, '6nM!')](x)));
    return btoa(String[S(0x1bc, 'bQHG') + S(0x262, 'iIeX') + S(0x253, 'KL$e') + 'ode'](...L, ...V, ...new Uint8Array(R)));
}
Understanding the Obfuscation
Using Babel, we can traverse all call expressions to the string decoding functions and replace them with the resulting cleartext to return the original function names. This makes static analysis a lot easier.
The script’s string decoding process works in three steps:
1. Define the encoded string constants
These are stored in a function that returns an array of all the encoded strings used throughout the script.
function w() {
  const D = ['veeq', 'WOfpW70', '... the rest of the strings ...'];
  w = function () {
    return D;
  };
  return w();
}
2. Shuffle the string constants
Before we can decode the string constants, the array is shuffled until a specific predicate, determined at build time, returns true. This shuffling happens inside an IIFE and looks like this:
(function (H, P) {
  const I = J,
  r = H();
  while (!![]) {
    try {
        const q = parseInt(I(0x1c4, 'ZGpA')) / (0x537 * 0x5 + 0xbf + -0x1ad1) + parseInt(I(0x295, 'Lj3S')) / (-0x981 + -0x1084 + 0x1a07) + parseInt(I(0x209, 'MxSD')) / (-0x391 * -0x7 + -0x1cd1 + -0x17 * -0x2b) * (parseInt(I(0x27b, 'nF93')) / (-0x26f0 * -0x1 + -0x105e + -0x2 * 0xb47)) + -parseInt(I(0x1c2, 'Lj3S')) / (-0x36 * -0xb7 + -0x1 * -0xb89 + -0x190f * 0x2) * (-parseInt(I(0x26d, '3bXU')) / (0x743 * 0x3 + 0x1a07 + -0x2fca)) + -parseInt(I(0x1cd, '3bXU')) / (-0x17aa + -0xe90 + 0x2641) * (-parseInt(I(0x259, '6TSl')) / (-0x1ead * -0x1 + -0x123 * -0x12 + -0x331b)) + parseInt(I(0x1fc, 'dP9k')) / (-0x5 * -0x63d + -0xdea * 0x1 + 0x2 * -0x89f) + -parseInt(I(0x28e, 'Ynb)')) / (-0x15d1 + 0x1 * -0x1795 + -0x2d70 * -0x1) * (parseInt(I(0x1b6, '!CQn')) / (-0x520 * -0x1 + 0x8ef * -0x2 + -0x1 * -0xcc9));
      if (q === P) {
        break;
      }
      else
        r['push'](r['shift']());

    } catch (d) {
      r['push'](r['shift']());
    }
  }
})(w, -0x8aa * 0x95 + -0xf2 * 0x159 + -0x32 * -0x2f2b);
3. Define the decode function
This function is called throughout the entire script. It retrieves the cleartext strings from the shuffled array and is often used when accessing or invoke functions on global objects:
e.g.:
new TextEncoder()['enc' + J(0x1c1, '@UgF')] // Likely is a call to TextEncoder().encode
The function responsible is an obfuscated mess:
function J(U, O) {
const g = w();
return J = function(y, H) {
    y = y - (0x244f + 0xd7 * -0x21 + -0x6b3);
    let P = g[y];
    if (J['WizbPL'] === undefined) {
        var r = function(i) {
            const G = 'abcdefghijklmnopqrstuvwxyzABCDEFGHIJKLMNOPQRSTUVWXYZ0123456789+/=';
            let C = ''
                , Y = '', X = C + r;
            for (let m = 0x1 * -0x161b + -0x1223 * 0x1 + 0x283e * 0x1, j, s, b = -0x368 * -0x7 + -0xcc + -0x170c; s = i['charAt'](b++); ~s && (j = m % (0x33b * 0x2 + 0x21ae * 0x1 + -0x2820) ? j * (-0xb5 * -0x6 + 0x19d * 0x1 + 0x23 * -0x29) + s : s,
            m++ % (-0x1de2 * 0x1 + -0x229d + -0x1581 * -0x3)) ? C += X['charCodeAt'](b + (-0x1039 + -0x20b * -0x4 + 0x1 * 0x817)) - (0x1 * 0x15bf + -0x25f0 + -0x5 * -0x33f) !== 0x2 * 0x301 + 0x1e73 + 0x3d * -0x99 ? String['fromCharCode'](0xc38 + -0x1 * -0x1e32 + 0x17 * -0x1cd & j >> (-(0x1 * -0x8d7 + 0x2b * -0x31 + 0x1114 * 0x1) * m & -0x16f6 + 0x2 * -0x179 + -0xcf7 * -0x2)) : m : 0x9 * 0xb1 + 0x712 + -0xd4b) {
                s = G['indexOf'](s);
            }
            for (let x = 0xc7 * -0x1f + 0x28 + 0x17f1, c = C['length']; x < c; x++) {
                Y += '%' + ('00' + C['charCodeAt'](x)['toString'](-0x1c20 + -0x8f3 + 0x2523))['slice'](-(-0x1e8b + 0x12d * -0xf + 0x202 * 0x18));
            }
            return decodeURIComponent(Y);
        };
        const F = function(G, C) {
            let Y = [], X = 0x240d + 0x10b2 + -0x34bf, m, b = '';
            G = r(G);
            let c;
            for (c = -0x884 + -0xc47 * -0x1 + 0x3c3 * -0x1; c < -0x224e + -0x1f32 + 0x1 * 0x4280; c++) {
                Y[c] = c;
            }
            for (c = -0x35d + 0x1202 + -0xea5 * 0x1; c < -0x2326 + 0x3f * -0x97 + 0x494f; c++) {
                X = (X + Y[c] + C['charCodeAt'](c % C['length'])) % (-0xba5 + -0xf50 + -0x11 * -0x1a5),
                m = Y[c],
// ...
If you're familiar with JavaScript obfuscation, or are a regular reader of our blog, you might recognize the style of this obfuscation. It's javascript-obfuscator, an extremely popular, open-source JavaScript obfuscator. If you’ve ever encountered obfuscated JS in the wild, there’s a good chance it was produced by this tool or a modified variant.
Because of its popularity, there are already public tools that can reverse the transformations. The most reliable is a deobfuscator by ben-sb. You can try it out at https://obf-io.deobfuscate.io.
In this article, however, we’ll create our own deobfuscator from scratch to understand how the process works under the hood.
By looking at the obfuscator’s source, we can find the template for the string decode function. We see that the function is just doing a Base64 decode (atob) followed by RC4 (combined with some anti-tamper) to reveal the original string:
export function StringArrayRC4DecodeTemplate (
    randomGenerator: IRandomGenerator
): string {
    const identifierLength: number = 6;
    const initializedIdentifier: string = randomGenerator.getRandomString(identifierLength);
    const rc4Identifier: string = randomGenerator.getRandomString(identifierLength);
    const onceIdentifier: string = randomGenerator.getRandomString(identifierLength);

    return `
        if ({stringArrayCallsWrapperName}.${initializedIdentifier} === undefined) {
            {atobPolyfill}
            {rc4Polyfill}
            {stringArrayCallsWrapperName}.${rc4Identifier} = {rc4FunctionName};

            {stringArrayCacheName} = arguments;

            {stringArrayCallsWrapperName}.${initializedIdentifier} = true;
        }

        const firstValue = stringArray[0];
        const cacheKey = index + firstValue;
        const cachedValue = {stringArrayCacheName}[cacheKey];

        if (!cachedValue) {
            if ({stringArrayCallsWrapperName}.${onceIdentifier} === undefined) {
                {selfDefendingCode}

                {stringArrayCallsWrapperName}.${onceIdentifier} = true;
            }

            value = {stringArrayCallsWrapperName}.${rc4Identifier}(value, key);
            {stringArrayCacheName}[cacheKey] = value;
        } else {
            value = cachedValue;
        }
    `;
}
Writing the Tool
While this information is cool to know, for our case it doesn't really matter what encoding scheme they're using since we won't be reimplementing it. Instead, we'll use Babel to extract all the functions needed for string decoding and call them whenever we run into a decode call in the source.
Following the steps described above:
1. Finding the encoded string constants
Using @babel/traverse, we can look for a function that defines an array made up entirely of string constants. That signature is good enough for our purposes since there's only one function like that in the script:
const ast = parser.parse(source, {
  sourceType: 'module',
  plugins: ['dynamicImport']
});

let stringConstantsFunction = null;

traverse.default(ast, {
  // Visit all function declarations
  FunctionDeclaration(path) {
    const body = path.node.body.body;
    // Get the first statement of the function declaration
    const [firstStatement] = body;
    if (
      // If we are declaring a variable that is an array with only string literals
      firstStatement?.type === 'VariableDeclaration' &&
      firstStatement?.declarations[0]?.init?.type === 'ArrayExpression' &&
      firstStatement?.declarations[0]?.init?.elements?.every(el => el?.type === 'StringLiteral')
    ) {
      // We found the string constants function
      stringConstantsFunction = path.node;
    }
  }
});
2. Finding the shuffle function
For this, we can search for an IIFE that contains a while(!![]) loop:
traverse.default(ast, {
    ExpressionStatement(path) {
      const expr = path.node.expression;
      if (
        expr?.type === 'CallExpression' &&
        expr.callee.type === 'FunctionExpression'
      ) {
        // Look for a while statement with `!!` in the tested expression
        const hasShuffle = expr.callee.body.body.some(n =>
          n.type === 'WhileStatement' &&
          n.test.type === 'UnaryExpression' &&
          n.test.operator === '!' &&
          n.test.argument.type === 'UnaryExpression' &&
          n.test.argument.operator === '!'
        );
        if (hasShuffle)
            shuffleNode = path.node;
      }
    }
  });
3. Finding the decode function
Now, we just need to look for a function where the first statement includes a call to the string constants function from step 1:
traverse.default(ast, {
FunctionDeclaration(path) {
    const body = path.node.body.body;
    const [firstStatement] = body;
    if (
    // Are we calling the string constants function?
    firstStatement?.type === 'VariableDeclaration' &&
    firstStatement?.declarations[0].init?.type === 'CallExpression' &&
    firstStatement?.declarations[0].init.callee.name === stringConstantsFunction.id.name
    ) {
    // We found the string decode function
    stringDecodeFunction = path.node;
    }
},
});
Cleaning the script
Using the Node vm package, we can move these functions into a self-contained script and run them in their own execution environment.
It’s worth noting that this is not a sandboxed environment so this doesn’t offer any real security or isolation:
// Create empty AST as the base for our new script
const deobfAst = parser.parse('', { sourceType: 'module' });

// Push the functions we located
deobfAst.program.body.push(stringConstantsFunction, stringDecodeFunction, shuffleNode);
// Export it so we can use it
deobfAst.program.body.push(
  parser.parse(`module.exports = ${stringDecodeFunction.id.name};`, { sourceType: 'module' }).program.body[0]
);

const { code: deobfCode } = generate.default(deobfAst, { compact: true });
const ctx = { module: {} };

// Create a VM context to run in
vm.createContext(ctx);
vm.runInContext(deobfCode, ctx);

// Reference the exported function so we can call it in our next pass
const decodeString = ctx.module.exports;
We can now go over all the encoded strings and call the deobfuscate function on each one, replacing the original node with its return value:
const deobfuscateStrings = ({ types: t }) => ({
  visitor: {
    CallExpression(path) {
      const [first, second] = path.node.arguments;
      if (
        // Is the first argument a numeric hex literal (e.g.: 0x123)
        t.isNumericLiteral(first) &&
        first.extra?.raw?.startsWith('0x') &&
        // Is the second argument a string literal?
        t.isStringLiteral(second)
      ) {
        // Call the decode function and replace the node with the return value
        const val = decodeString(first.value, second.value);
        path.replaceWith(t.stringLiteral(val));
      }
    }
  }
});
This will correctly convert our previously ciphered function call from
new TextEncoder()['enc' + S(0x1c1, '@UgF')]
to
new TextEncoder()["enc" + "ode"]
As an added convenience, we can add a constant folding pass to turn expressions like "enc" + "ode" into just encode:
const constantFoldPlugin = ({ types: t }) => ({
  visitor: {
    BinaryExpression: {
      exit(path) {
        if (
          path.node.operator === '+' &&
          t.isStringLiteral(path.node.left) &&
          t.isStringLiteral(path.node.right)
        ) {
          path.replaceWith(t.stringLiteral(path.node.left.value + path.node.right.value));
        }
      }
    }
  }
});
And similarly for binary expressions that only contain numeric literals (e.g. -0x239e + -0xa7 * -0xf + 0x19d6 becomes 1):
const evaluateConstants = ({ types: t }) => ({
  visitor: {
    Expression(path) {
      // Avoid replacing expressions that have already been simplified
      if (path.node._evaluated) return;

      const evaluation = path.evaluate();

      if (evaluation.confident && typeof evaluation.value === 'number') {
        const literal = t.numericLiteral(evaluation.value);
        literal._evaluated = true; // prevent re-visiting
        path.replaceWith(literal);
      }
    }
  }
});
With these passes, the previously obfuscated X function becomes a lot clearer:
async function X(b, x) {
    const S = k;
    let L = crypto["getRandomValues"](new Uint8Array(16)),
    V = crypto["getRandomValues"](new Uint8Array(12)),
    // These variables are set in the beginning of the script
    // but i've included them here as comments to make the
    // function's purpose more obvious

    W = await crypto["subtle"]["importKey"](H["nOdPK"], new TextEncoder()["encode"](b), H["QTrOm"] /* PBKDF2 */, !1, [H["vzGnW"] /* deriveBits */, H["EeBaB"] /* deriveKey */]),
    E = await crypto["subtle"]["deriveKey"]({
        'name': H["QTrOm"] /* PBKDF2 */,
        'salt': L,
        'iterations': 100000,
        'hash': H["TtSII"] /* SHA-256 */
    }, W, {
        'name': H["mgAqr"] /* AES-GCM */,
        'length': 256
    }, !1, ["encrypt"]),
    R = await crypto["subtle"]["encrypt"]({
        'name': H["mgAqr"] /* AES-GCM */,
        'iv': V
    }, E, new TextEncoder()["encode"](JSON["stringify"](x)));
    // 'XyyaZ': function(s, b) {
    //     return s(b);
    // },
    return H["XyyaZ"](btoa, String["fromCharCode"](...L, ...V, ...new Uint8Array(R)));
}
Understanding the X Function
This function uses the WebCrypto API to derive an AES-256 key via PBKDF2, encrypts the data using AES-GCM, and encodes the salt, IV, and payload into a Base64 string. This is what gets sent to the backend as part of the browser signal verification process.
The Browser Signal Payload
The browser signals themselves are defined in several functions:
Detect Leaks in window & navigator
Many automation frameworks leak properties into the window object, either for convenience or to enable IPC during development. While useful for debugging, these properties can become an easy giveaway and a reliable way to flag yourself as a bot.
// Detect various web driver leaks
function v(s /* s = window */) {
    const o = k;
    // These two properties are set when controlling
    // a Chromium based browser through the Chrome Devtools Protocol (CDP)
    return !!s["domAutomation"] ||
    !!s["domAutomationController"] ||
    // Selenium detection
    !!s["_WEBDRIVER_ELEM_CACHE"] ||
    // PhantomJS detection (https://phantomjs.org/)
    !!s["callPhantom"] ||
    !!s["_phantom"] ||
    // NightmareJS detection (https://github.com/segment-boneyard/nightmare)
    !!s["__nightmare"] ||
    // chromedriver detection (https://chromium.googlesource.com/chromium/src/+/lkgr/chrome/test/chromedriver/chrome/devtools_client_impl.cc)
    !!s["cdc_adoQpoasnfa76pfcZLmcfl_Array"] ||
    !!s["cdc_adoQpoasnfa76pfcZLmcfl_Promise"] ||
    !!s["cdc_adoQpoasnfa76pfcZLmcfl_Symbol"] ||
    // Puppeteer detection
    Function["prototype"]["toString"]["toString"]()["includes"](H["NeMls"] /* __puppeteer_evaluation_script__ */) ||
    Function["prototype"]["toString"]["toString"]()["includes"](H["WKkio"] /* __playwright_evaluation_script__ */);
}

function F(s /* s = window */) {
    const B = k;
    // Selenium check
    return q = "bmB3TrbX", !!s["navigator"]["seleniumWebdriver"] ||
    // These property is set to true when controlling Chrome using CDP
    !!s["navigator"]["webdriver"] ||
    !!s["webdriver"] ||
    !!s["driver"] ||
    // Another selenium check
    !!s["selenium"];
}
Detect "headless" in User Agent
function i(s /* s = window */) {
    const M = k;
    // Check if the navigator's user agent includes "headless".
    // This is true when Chromium is being controlled with the `--headless` flag passed.
    return s["navigator"]["userAgent"]["toLowerCase"]()["includes"](H["ZUIun"] /* headless */);
}
Collect Browser's GPU Renderer & Vendor Information
By creating a canvas and accessing the WebGL context, the script can pull details about the GPU vendor and renderer.
This is helpful for detecting headless environments, where the renderer is often something like “SwiftShader”, Google’s CPU-based fallback for graphics6.
Because this info can be easily spoofed, more advanced anti-bots go a step further. They’ll actually draw something to the canvas, hash the result, and compare that hash to known good or bad values. This allows them to detect subtle differences in how GPUs render images, which can be harder to fake.
Vercel’s Basic Mode doesn’t do any image hashing yet, but it’s a logical next step if they decide to improve their WebGL detection.
If you’re curious about how this works at scale, check out Google’s paper on Picasso: Lightweight Device Class Fingerprinting for Web Clients7
function G(s) {
    const T = k;
    // Create a canvas element
    let b = s["document"]["createElement"]("canvas");
    b["getContext"]("webgl") || b["getContext"](H["aSVub"] /* experimental-webgl */);

    // Get the WebGL context
    let x = b["getContext"](H["LauIM"] /* webgl */) || b["getContext"]("experimental-webgl"),
    c = x?.["getExtension"]?.(H["TCEXm"] /* WEBGL_debug_renderer_info */);

    // Return the vendor and renderer
    // On my desktop machine, this returns
    // Vendor: Google Inc. (NVIDIA)
    // Renderer: ANGLE (NVIDIA, NVIDIA GeForce RTX 4080 (0x00002704) Direct3D11 vs_5_0 ps_5_0, D3D11)

    // This is used to check if the browser is utilizing a GPU for rendering
    // Or is relying on software rendering (useful for checking if browser is headless or running in a VM without a GPU)
    return c ? (r = H["vtKat"], {
    'v': x["getParameter"](c["UNMASKED_VENDOR_WEBGL"]),
    'r': x["getParameter"](c["UNMASKED_RENDERER_WEBGL"])
    }) : null;
}
Detect Chrome Devtools Protocol (CDP)
The function attempts to detect whether a Chromium-based browser is being instrumented using the Chrome DevTools Protocol (CDP). It creates an Error object and overrides its stack property with a custom getter. Under normal circumstances, Chromium doesn’t access the stack property when console functions are called. However, if CDP is enabled, and has issued the Runtime.enable command, Chromium serializes the object to send it over the DevTools protocol. This serialization process accesses the stack property, triggering the custom getter.
If this was confusing, please read Antoine Vastel's How New Headless Chrome & the CDP Signal Are Impacting Bot Detection8 for a detailed explanation :)
This check also doubles as a way to see if the user has the devtools opened.
function C() {
    const A = k;
    // If we are running this script locally, don't run this check
    if (location["hostname"] === H["GftGm"] /* localhost */ || location["search"]["includes"](H["IMeIJ"] /* botDebug */)) return !1;

    // CDP check
    let s = !1 // false,
    b = new Error('');
    return Object["defineProperty"](b, H["IPbzr"], {
    'get'() {
        return s = !0 /* true */, '';
    }
    }), console['log'](b), s;
}
Store Entire Payload in an Object
The results of all of these detections are then stored in an object returned by function Y:
function Y() {
    // This function runs and returns the results of
    // all of the browsdr checks
    const a = k;
    let s = window;
    return {
    // Any web driver leaks in navigator / window?
    'p': H["YvjhB"](v, s),
    /*
    'nszIW': function(s, b) {
        return s * b;
    },

    Multiply these two constants.
    */
    'S': H["nszIW"](0.4856383631795842, 2),
    // WebGL renderer and vendor object
    'w': H["YvjhB"](G, s),
    // More selenium, webdriver, phantom checks in globals
    's': F(s),
    // Does user agent contain "headless"?
    'h': H["YvjhB"](i, s),
    // Another CDP / Devtools check by abusing the `Error` object
    'b': H["uUxBo"](C)
    };
}
This payload is then passed to the encryption function described earlier.
Next.js hooks into fetch calls to protected routes and passes the encrypted result as the x-is-human header.
window.fetch = async (e, t) => {
   // ...
    let p = await c()
      , m = new Headers((null == t ? void 0 : t.headers) || (e instanceof Request ? e.headers : void 0));
    m.set("x-is-human", JSON.stringify(p));
    let g = {
        ...t,
        headers: m
    };
    // ...
    return window.fetch(e, g)
}
Bypassing the Checks
These are all the checks in place at the time of writing. Vercel's BotID Basic mode is, as the name suggests, pretty basic. These checks can be easily bypassed by spoofing the values before they’re collected:
// Call Runtime.disable to prevent CDP check from being flagged
(function patchDetection() {
    // Patch navigator properties
    Object.defineProperty(navigator, 'webdriver', { get: () => false });

    delete navigator.seleniumWebdriver;
    delete navigator.driver;
    delete navigator.selenium;

    // Patch global window leaks
    delete window.domAutomation;
    delete window.domAutomationController;
    delete window._WEBDRIVER_ELEM_CACHE;
    delete window.callPhantom;
    delete window._phantom;
    delete window.__nightmare;
    delete window.cdc_adoQpoasnfa76pfcZLmcfl_Array;
    delete window.cdc_adoQpoasnfa76pfcZLmcfl_Promise;
    delete window.cdc_adoQpoasnfa76pfcZLmcfl_Symbol;

    // Override Function.prototype.toString to hide Puppeteer/Playwright markers
    const originalToString = Function.prototype.toString;
    Function.prototype.toString = function () {
        const result = originalToString.call(this);
        return result
            .replace(/__puppeteer_evaluation_script__/g, '')
            .replace(/__playwright_evaluation_script__/g, '');
    };

    // Patch navigator.userAgent to hide "Headless"
    const originalUserAgent = navigator.userAgent;
    Object.defineProperty(navigator, 'userAgent', {
        get: () => originalUserAgent.replace(/HeadlessChrome|headless/gi, 'Chrome')
    });

    // Patch WebGLRenderingContext.getParameter to spoof renderer & vendor
    const getParameter = WebGLRenderingContext.prototype.getParameter;
    WebGLRenderingContext.prototype.getParameter = function (param) {
        const ext = this.getExtension('WEBGL_debug_renderer_info');
        if (param === ext.UNMASKED_VENDOR_WEBGL) {
            return "Google Inc. (NVIDIA)";
        }
        if (param === ext.UNMASKED_RENDERER_WEBGL) {
            return "ANGLE (NVIDIA, NVIDIA GeForce RTX 4080 (0x00002704) Direct3D11 vs_5_0 ps_5_0, D3D11)";
        }
        return getParameter.call(this, param);
    };
})();
Testing Detection with Playwright
I wrote a Playwright script to test two things:
- Does Basic BotID detect an unpatched Playwright?
- If so, can I bypass BotID with my patches?
While testing the first part, I noticed something weird.
const { chromium } = require('playwright');

(async () => {
  const browser = await chromium.launch({ headless: true });
  const page = await browser.newPage();

  // Go to the page
  await page.goto('https://blog-git-botid-veritasjs-projects.vercel.app/test');

  // Submit the form
  await Promise.all([
    page.locator('button').evaluate(button => button.click())
  ]);

  const result = await page.locator('p').innerText();
  console.log(`Is Bot: ${result}`);

  const userAgent = await page.evaluate(() => navigator.userAgent);
  console.log(`User Agent: ${userAgent}`);

  const webdriver = await page.evaluate(() => navigator.webdriver);
  console.log(`Webdriver: ${webdriver}`);

  await browser.close();
})();
Observations from Playwright Testing
Output:
Is Bot: You are a human
User Agent: Mozilla/5.0 (Windows NT 10.0; Win64; x64) AppleWebKit/537.36 (KHTML, like Gecko) HeadlessChrome/138.0.7204.23 Safari/537.36
Webdriver: true
I found this odd, since our user agent contains Headless and navigator.webdriver is set to true. That should be enough to trip at least two flags, making it obvious to BotID that we’re a bot.
To dig deeper, I wrote some patches to make sure we fail every check:
await page.addInitScript(() => {
    // We are using a webdriver
    window.domAutomation = true;
    window.navigator.webdriver = true;

    // Change the user agent to include Headless
    Object.defineProperty(navigator, 'userAgent', {
        get: () => 'HeadlessChrome',
    });

    // Spoof WebGL attributes to tell them we are software rendering
    const getParameter = WebGLRenderingContext.prototype.getParameter;
    WebGLRenderingContext.prototype.getParameter = function (param) {
        const ext = this.getExtension('WEBGL_debug_renderer_info');
        if (ext) {
            if (param === ext.UNMASKED_VENDOR_WEBGL) {
                return "LOL obviously fake vendor!";
            }
            if (param === ext.UNMASKED_RENDERER_WEBGL) {
                return "Google SwiftShader";
            }
        }
        return getParameter.call(this, param);
    };
});
is-bot: You are a human
User Agent: HeadlessChrome
Webdriver: true
We were still wrongly identified as a human. My guess is that Vercel is using this launch window to gather signals from a variety of devices before they start enforcing blocks. This likely helps them avoid false positives while they figure out which values to label as “bot-like” versus “human.”
Out of curiosity, I replaced the entire signals payload with an empty object {} in DevTools and only then was I flagged as a bot.
At the moment, it seems Basic mode is so basic that it allows everything to pass as human. That’ll likely change as they gather more telemetry to better identify what a bot signal looks like.
Deep Analysis Mode
Vercel recommends using their Deep Analysis mode instead of Basic. This mode uses Kasada's anti-bot to collect even more signals and compare them against their existing trained model to detect bot-like requests.
Enabling this mode requires a Pro ($20/mo) or Enterprise plan, plus an additional cost of $1/1000 req. I upgraded my project from Hobby to Pro to see how Deep Analysis mode works.
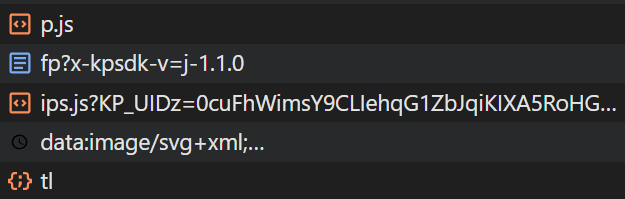
With one toggle in the dashboard, Deep Analysis mode was live. I immediately noticed some new but familiar Kasada network requests:
How Deep Analysis Works
Deep Analysis uses Kasada's anti-bot script, the same scripts deployed at sites like Nike. It uses a custom virtual machine to obfuscate their signal collection. This means we'd need to disassemble the embedded bytecode to understand what is being sent to their servers for analysis.
This is a much larger undertaking, and was actually done in another nullpt.rs series titled Devirtualizing Nike.com's Bot Protection by author umasi a while back.
Check it out if you're curious :)
Conclusion
In its current form, Vercel’s BotID (Basic mode) doesn’t seem configured to actually stop bots. It’s likely being used to quietly collect signals for its models before stricter detection kicks in. Deep Analysis, on the other hand, does actively block more advanced bots using Kasada’s fingerprinting scripts and classifiers.
Both modes rely on fingerprinting and client-side data collection, reinforcing the broader trend: anti-bots are increasingly opaque, data-hungry, and can skew toward a narrow definition of what a “normal” user is.
These scripts serve a real purpose, but the way they’re built continues to shape the web in ways that are hard to ignore and even harder to challenge.
Curious to hear your thoughts
Footnotes
-
https://blog.castle.io/credential-stuffing-attacks-anatomy-detection-and-defense/#what-is-a-credential-stuffing-attack ↩
-
https://research.google/pubs/picasso-lightweight-device-class-fingerprinting-for-web-clients/ ↩
-
https://datadome.co/threat-research/how-new-headless-chrome-the-cdp-signal-are-impacting-bot-detection/ ↩
